 Use your scraps and tidbits to make a custom cover for a planner. I found a 2010 planner for $1 at Target. Score! You can turn an ordinary notebook or diary or planner into something special in about an hour.
How to Make a Book Cover:
Make fabric out of scraps: Sew together scraps into chunks of fabric, then combine the chunks into a larger piece of 'fabric'. Press as you go. Make it 6" wider and 4" taller than your planner. Press well.
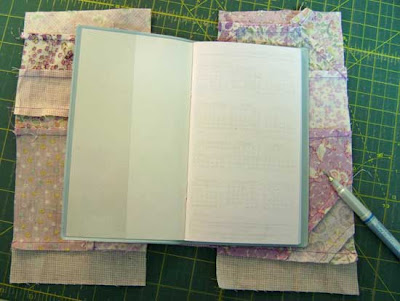
Place the planner on top of your fabric. Draw a line to mark the top and bottom of the spine of the planner, extending it about 1" on either side of the spin, and making it a smidge taller than the planner. Clip straight down to the line, as shown below. Press this flap down. Topstitch close to the edge of the flap.

Lay planner on fabric, and press it down flat. Draw around it, about 1/8" from the edges.

Trim the edges nice and even, leaving 1-2" on the top and bottom, and 2-3" on the sides. Press under 1/4" on the sides and topstitch.
Fun! Share your project with Just something I whipped up every Monday!


1 comment:
I am loving these wonderful Christmas ideas! ruth anne rashorter@embarqmail.com
Post a Comment